Loop stitch also known as fur stitch. It creates a fluffy and soft fabric. You can use this method for your household furnishing projects such as rugs and sofa covers, you can also use it to make loopy knitted animals or you can even use it to add textured loops instead of fridge on the both ends of a scarf.
There are several knitting methods and variations for making the loops. I am going to share with you the method that I think it is easier to work with.
You can start to knit the loop stitch at your desired row and stitch or you can make the loops on the wrong side and the right side so that you get loops on the both sides. By referring to the photos below, you will find that I start to knit another row of loop stitches from the second stitch on the left needle.
Instruction:
Knit into your desired stitch but do not drop the stitch of your left needle.
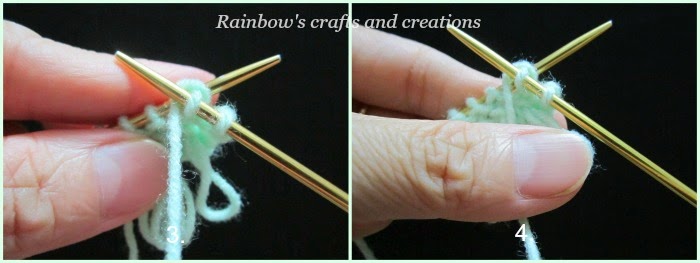
Bring the working yarn to the front between the two needles and then place your thumb on the working yarn.
Wrap the yarn around your thumb and bring the yarn to the back between the two needles. Keeping your thumb in the loop and insert your right needle into the same stitch.
After that, knit it as usual so you can drop the stitch of your left needle. Now, you have two new stitches and a loop on your right needle. Pick up the first stitch ( the second last stitch from the right
needle tip) and pass it over the second stitch ( the last stitch from
the right needle tip).
Photo no. 10 shown is a loop stitch that I have just finished and photo no. 11 shown is two rows of loop stitches.
Note :
If you are using thick yarn, I suggest you to make the loops on every other stitch. With this method you will get a smoother and neater surface for your knitting projects.


No comments:
Post a Comment